
Trainings
3D Printed Dentures: 7-Step Digital Workflow for Labs
Oct
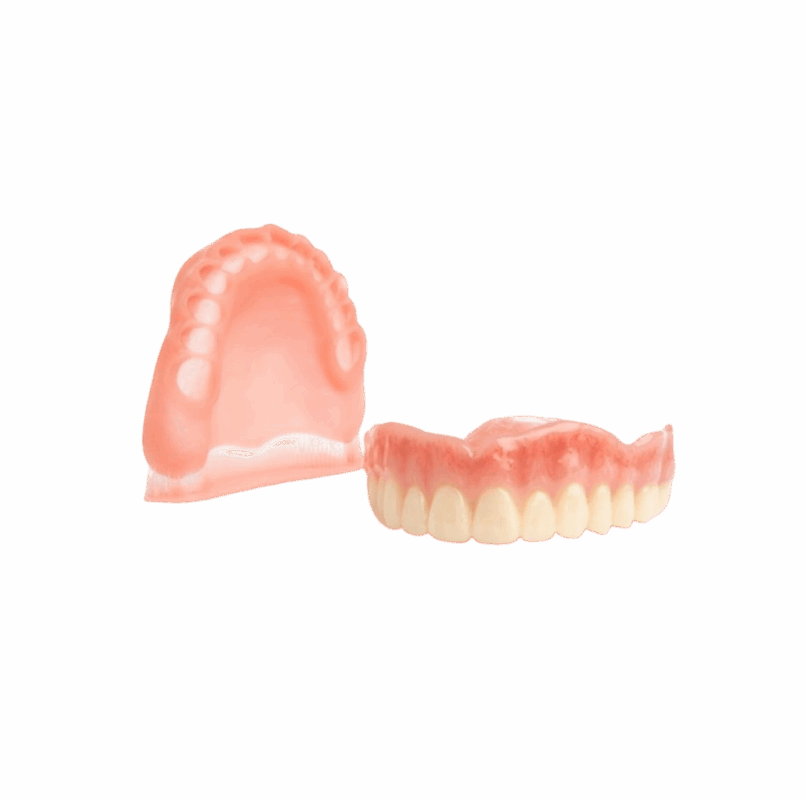
3D printed dentures have moved from experiment to everyday production in many dental labs. A full denture that once took five appointments and a week of wax, flasking and boil-out can now be designed in CAD and printed overnight. The digital file stays on record, so a lost or broken denture can be reprinted without starting over.
This guide walks through a practical 7-step digital denture workflow: scanning, bite registration, design, try-in, printing, bonding and finishing. It also covers the choice between monolithic and two-piece dentures and the mistakes that cause most remakes. If you are new to resin printing, start with our overview of dental 3D printing materials.
Why Labs Are Moving to 3D Printed Dentures
The biggest change is not speed alone, it is control. With digital dentures, every step from tooth setup to base thickness is visible on screen and repeatable.
- Fewer manual steps. No waxing, flasking, packing or boil-out. Less bench time means more cases per technician.
- A permanent digital record. The design file can be reprinted for a spare, a lost denture or a reline base.
- Consistent results. Resin dosing and curing are controlled by the printer and the curing unit, not by hand mixing.
- Batch production. One build platform can hold several bases or tooth arches, which lowers cost per unit.
- Easier communication. A printed try-in lets the dentist and patient approve esthetics and bite before the final denture is made.
Printed dentures are not right for every case. Very complex cases, heavy bruxers or cases needing a specific processed acrylic may still be better served by conventional or milled techniques. The best labs use printing where it fits and keep other options open.
The 7-Step Digital Denture Workflow
Step 1: Capture the Edentulous Arches
Start with an accurate digital impression. Many labs scan a conventional final impression or a stone model on a desktop scanner, because soft, mobile tissue is hard to capture intraorally. Intraoral scanning can work for well-defined ridges, but border extension and the posterior palatal seal still need clinical judgment. Not sure which scanner fits your workflow? See intraoral vs desktop scanners.
Step 2: Record the Bite and Esthetic References
A digital denture is only as good as its jaw relation record. Scan a bite rim or a registration record with vertical dimension, midline, smile line and lip support marked. Add a photo of the patient’s face if possible; it makes tooth setup far easier.
Step 3: Design the Denture in CAD
In Exocad, the Full Denture module guides you through model analysis, tooth library selection, automatic setup, occlusion adjustment and gingiva shaping. Check base thickness carefully, as thin areas are where printed bases crack.
Step 4: Print a Try-In
Before printing final materials, print a monolithic try-in in a dedicated try-in resin such as Asiga DentaTRY. The dentist checks fit, bite, vertical dimension and esthetics chairside. Changes go back into the design file, not onto a wax rim, so nothing is lost.
Step 5: Print the Denture Base and Teeth
Once the try-in is approved, print the base in a pink denture base resin and the teeth in a tooth-shade resin. Browse our full denture resins and gingiva resins. Follow the manufacturer’s validated printer settings and orientation. Read the resin’s technical data sheet first; our guide on reading a resin technical data sheet explains which numbers matter.
Step 6: Bond the Teeth to the Base
For two-piece dentures, clean both parts, seat the teeth into their sockets and bond them with the bonding material the resin manufacturer specifies. Check that every tooth is fully seated; a tooth sitting high changes the occlusion you designed.
Step 7: Wash, Post-Cure and Finish
Post-processing decides the final strength and biocompatibility of 3D printed dentures. Wash off uncured resin, dry the parts fully and post-cure exactly as the resin’s instructions require. Then remove supports, polish and characterize the gingiva if needed. Our detailed guide covers washing, curing and polishing.
Monolithic vs Two-Piece Printed Dentures
There are two main ways to produce 3D printed dentures. The right choice depends on the case, the materials you use and how much esthetic detail the patient expects.
| Monolithic (one piece) | Two-piece (base + teeth) | |
|---|---|---|
| How it is made | Teeth and base printed as one part | Base and teeth printed separately, then bonded |
| Esthetics | Limited; teeth and gingiva share one material or need staining | Better; pink base and tooth-shade teeth |
| Production time | Fastest | Longer, adds a bonding step |
| Typical use | Try-ins, immediate or interim dentures | Definitive dentures |
| Main risk | Lower esthetic result | Teeth not fully seated or debonding |
Many labs use both: a monolithic print for the try-in, then a two-piece denture for delivery.
5 Common Mistakes with Digital Dentures
- Poor border capture. Underextended borders lose retention, no matter how well the denture is designed. Fix the impression, not the CAD file.
- An unreliable bite record. A wrong vertical dimension shows up only at delivery. Always confirm it at the try-in.
- Bases designed too thin. Thin palates and flanges crack. Keep to the minimum thickness the resin manufacturer recommends.
- Using non-validated print settings. Denture resins are medical device materials. Generic settings can leave parts under-cured and weaker.
- Skipping or rushing post-curing. Under-cured resin can affect strength, color stability and biocompatibility. Follow the curing time and unit the resin was validated with.
What You Need to Start Printing Dentures
- A desktop or intraoral scanner to capture models, impressions and bite records
- CAD software with a full denture module, such as Exocad
- A dental 3D printer validated for denture resins, such as the Asiga MAX 2 or Asiga PRO 4K
- Denture base, tooth and try-in resins from the same validated system
- Wash and curing equipment, such as the Otoflash G171 or Asiga Cure
- Finishing tools for support removal and polishing
FAQ
Are 3D printed dentures as strong as conventional dentures?
Modern denture base resins are designed for definitive use, but strength depends on the specific material, base thickness and correct post-curing. Check the resin’s indications and technical data sheet before using it for a final denture.
How long does it take to make 3D printed dentures?
Design takes from under an hour to a few hours depending on experience. Printing usually runs a few hours and can be done overnight. Bonding and finishing add bench time, but the total is typically much shorter than the conventional process.
Can I reprint a denture from the same file?
Yes. That is one of the main advantages of digital dentures. As long as the patient’s tissue has not changed significantly, the saved design can be reprinted as a spare or replacement.
Do I need a special printer for dentures?
You need a printer and resin combination that the resin manufacturer has validated. Denture resins are regulated materials, and validated settings help ensure proper strength and biocompatibility.
Should I print monolithic or two-piece dentures?
Monolithic dentures are faster and work well for try-ins and interim dentures. Two-piece dentures offer better esthetics and are the common choice for definitive cases.
🛒 Ready to bring 3D printed dentures into your lab? Call (800) 316-8085 to talk with our team about printers, resins and training.
Not ready to invest yet? Our resin 3D printing service can print your denture designs while you build the workflow in-house.